Micropython is a greate framework for fast prototyping embedded systems. Easy to use and userfrendly framewrok is completly free to us (commercial use to). Micropython is a C implementation Python3 for embedded. This Python Language Interpreter maby not super fast but very usefull. Not all Python 3 features have been implemented so far, but enough to write fully functional and usable code.
Frimware with Micropython is avilable on official project site. Full free support always help your resolve your problems.
Hardware preparation
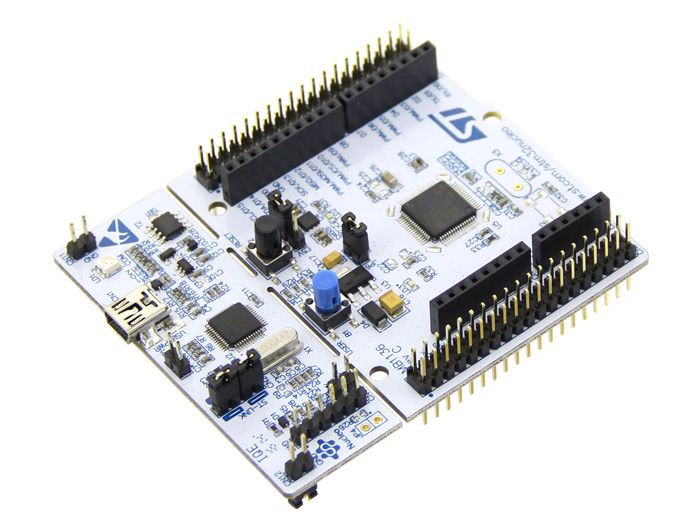
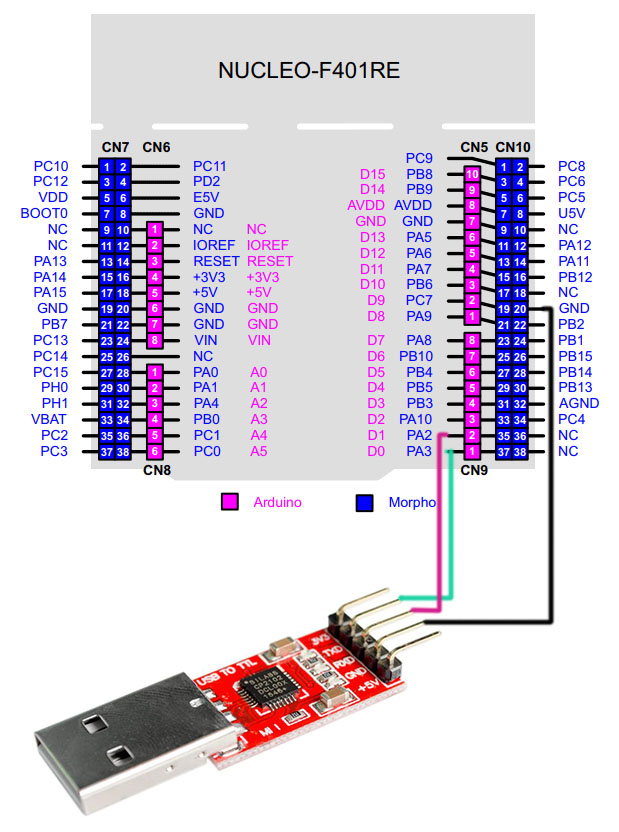
This article describe how to launch Python code on STM32 Cortex-M microcontroller. We need NUCLEO-F401RE base board with microcontroller STM32F401RE to achieve this goal. We use build-on-platform ST-Link programmer to flash our STM32F401RE. Dor communication with main microcontroller we use UART2 avilable on pins PA2 (TX) and PA3 (RX).
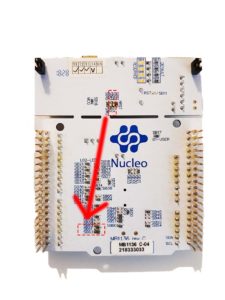
However default UART2 on NUCLEO-F401RE is disabled. So we must enable this feature. We must use Solder Bridge on bottom side of the board. Solder Bridge number SB63 and SB62 are respectively TX and RX pins.
Reconnect Solder Bridge number SB14 and SB13. Move resistor 0R into SB63 and SB62 on bottom side of our Nucleo-F401RE board.
Be sure is your ST-Link is connecte with our target microcontroller STM32F401RE. For this purpose, connect the connectors on CN2 header. Now you can plug-in USB cable in your Computer.
Upload Firmware
Before upload Firmware with Micropython you can update ST-Link Firmware on Nucleo board but this step is not obligated.
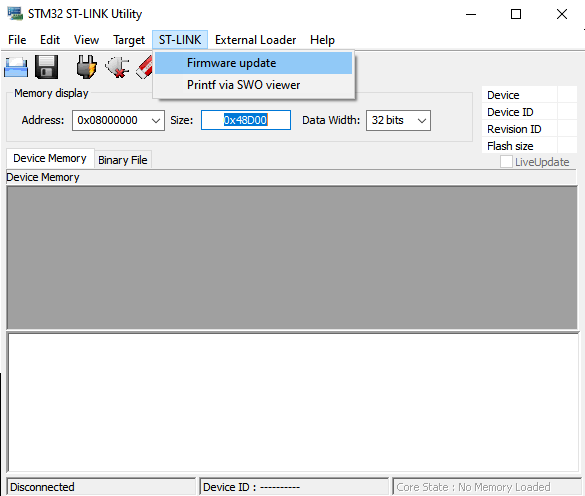
Download and install on your computerr STM32 ST-LINK Utility software. Run application and choose ST-LINK -> Firmware Update.
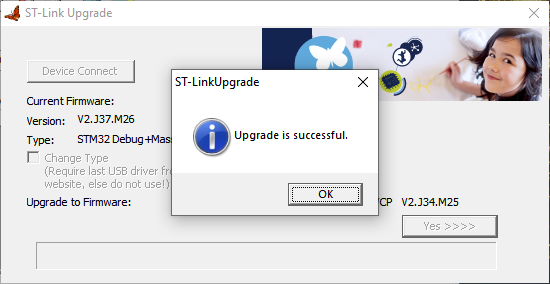
In new window ST-LINK Upgrade click on button Device Connect and Yes. Be sure is your Board is connected to computer via USB interface. After a few moments, we will receive information about the success of the operation.
Now we can upload new Firmware with Micropython into our tagert microcontroler STM32F401RE. Download newest stable verion of firmware from official website here is a link. Download latest DFU image with Firmware for NUCLEO_F401RE board. In our case: NUCLEO_F401RE-20200902-v1.13.dfu
For flashing memory in our main microcontroller we use STM32 ST-LINK Utility Software (the same application as we use for the update ST-Link Firmware). Befor load new firmware into this application we must convert DFU file into HEX file or S19 file. This is necessary because the current version of STM32 ST-LINK Utility (v4.5.0.0) doesn’t support files with extension *.dfu. So we use other software to convert DFU to acceptable file format.
Download and install DfuSe USB Software. Run sub-appliaction DFU File Manager and choose option: I want to EXTRACT S19, HEX or BIN files from a DFU one.
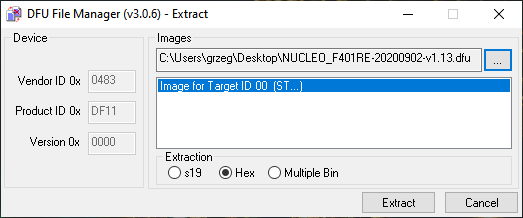
In new window DFU File Manager (v3.0.6) – Extract, select appriopriate image and Extraction option Hex.
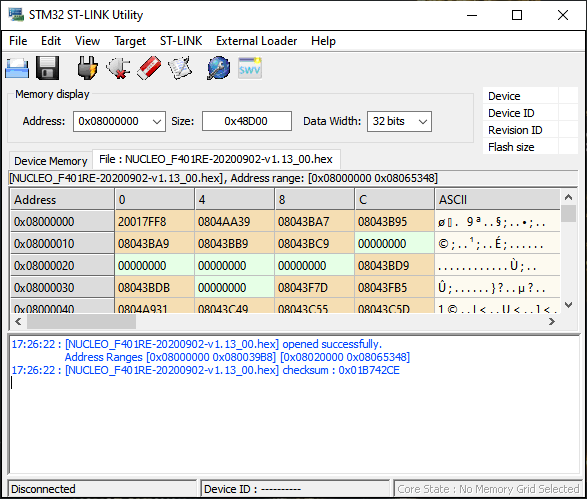
Now we are ready to load HEX file to STM32 ST-LINK Utility Application. Choose File -> Open file…
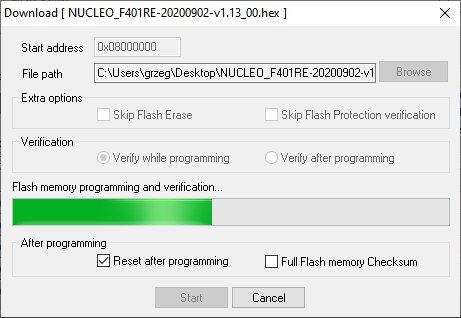
Be sure the board is connected to computer and choose Program & Verify… In new windows click Start to run flash process.
Disconnect Nucleo board with Computer and press RESET Button on board. Micropython was installed on our microcontroller!
First application
For communcation with Python Environment on STM32 microcontroller we use UART2. Use UART<->USB Adapter to connect STM32F401RE to Computer. Pin PA2 (TX) on Nucleo board connect to Pin RX UART-USB Adapter. Pin PA3 (RX) on Nucleo connect to Pin TX UART-USB Adapter.
Create example Python code and save to file with extension *.py. You can use your favourite Code Editor. Documentation and Code Snippet you can find on official Micropython website. Below is simple micropython code for Blinking User LED LS2 (Pin PA5) on Nucleo Board:
from machine import Pin
from utime import sleep_ms

user_led = Pin('PA5', Pin.OUT)

while True:
    user_led.on()
    sleep_ms(1000)
    user_led.off()
    sleep_ms(1000)
For upload main.py file to microcontroller memory use rshell tool. Git repository is avilable here – rshell git repository. Another ability to access memory and download our main.py file with example code is use uPyCraft Tool. We recommend the use of rshell because uPyCraft Tool has sometimes problems with uploading large files.
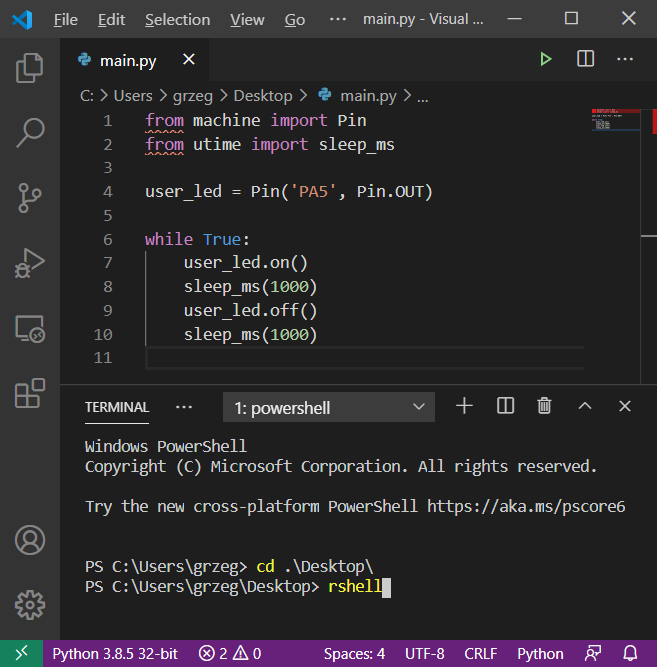
After installed rshell use system terminall and three simple command to copy main.py file into system memory on embedded device. Command rshell run shell. Command connect serial COM6 115200 connecting our device via Serial on Port COM6 with boudrate 115.2k. Command cp main.py /flash/ copy source file main.py to destination location /flash/ in the memory.